Texture templates for your Supergroup base
I've been asked several times how some of the textures for base items work, so I decided to post some template examples. The LCD screens, veteran reward comic covers, and the Supercomputer are the worst offenders.
The Supercomputer texture template is a bit complicated. The full image is used for the middle screen, while each of the side screens uses a bit of the same image (which I've marked in yellow) with the metallic frame around it.
The Mega Monitor Bank should use the same texture template as the Supercomputer, because it needs to have the same metallic frame. The Terminal, Corner Terminal and Monitor Bank use mixed images from the last two textures, and unless they both have the metallic frame around the image, the results will look pretty bad.
Labels: howto
How to distribute textures to your Supergroup.
Until today, all the texture changes you applied to your City of Heroes client remained in your own computer. You could see your Supergroup logo in the city's billboards, but nobody else could, unless you gave your supergroup members some complicated directions to install Splasher, download your custom texture, and manually apply it. With Splasher v1.20, that changes: texture replacement is now easy to do and easy to share as well. You can even have a billboard that changes whenever you want to... and your friends and Supergroup will see it change too!
Sharing your textures in five steps.
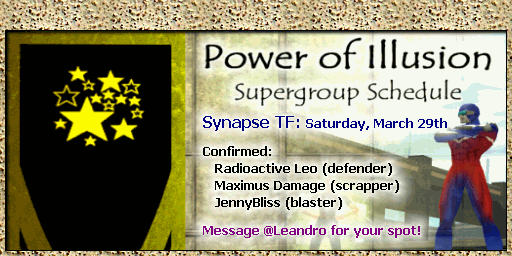
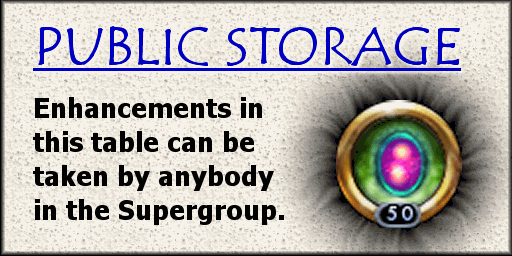
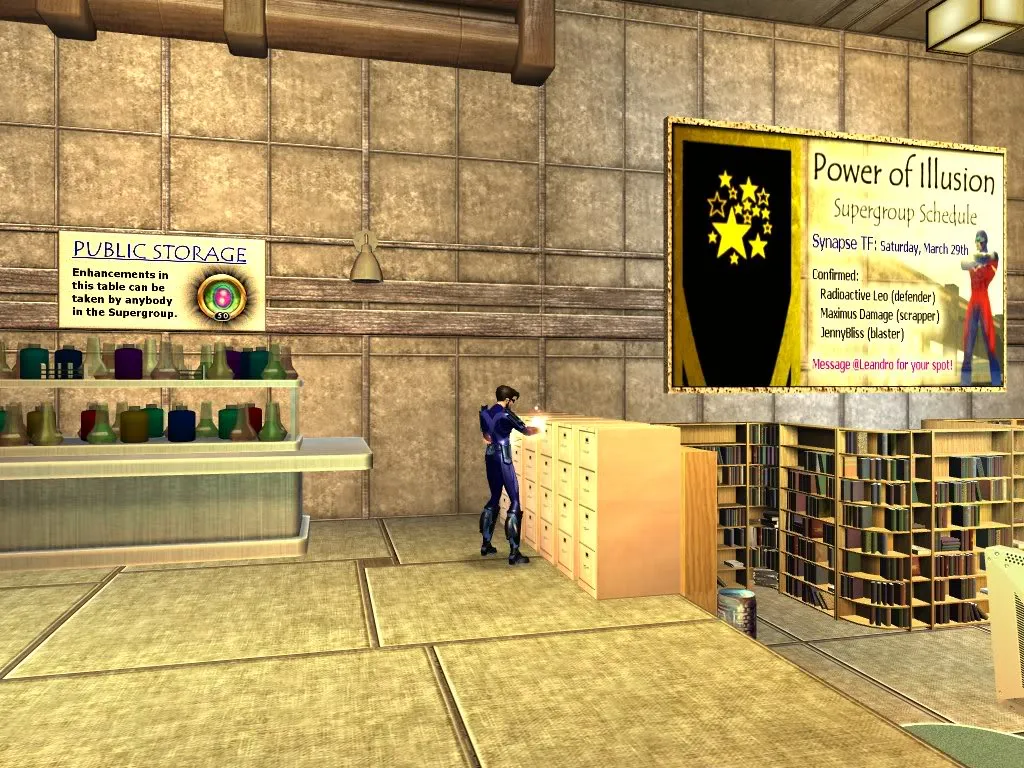
First, of course, you need to decide which textures you want to replace. For this example, I created two: a Supergroup Schedule to replace the Pastel Picture item, and a Public Storage sign to replace the Whiteboard 1 item. You can test the look of the textures by using the Textures tab; every texture available in there is available in the "Online" tab.
The second step is to upload your textures somewhere, in JPEG, PNG or GIF format. If multiple Supergroup leaders will update the Schedule, you might want to create a new
PhotoBucket account for your supergroup, and give the password to all leaders. Any location you upload the images to will work, however; the Supergroup's personal webpage for example. Just make sure that the website allows offsite linking: if you can enter the URL to the image in a new browser window and it works, you're good to go.
The third step is to open Splasher, go to the Online tab, and enter the URLs to your images. Click the "Pick" button to select which texture you are going to replace, and then enter the URL to your images. It's very easy to expand Splasher for more texures to be downloaded and applied at once, but for the initial release, you can replace up to five images at once.
Fourth step, optional, is to click "Download and Apply now". This will get the images from the URLs you've provided and apply them to the textures you've selected. If any of the URL fields changes color to red, that means Splasher couldn't process the image: make sure it's in JPEG, PNG or GIF format, and remember Splasher can only download HTTP links. If every file downloads and applies correctly, your test is a success!
The fifth and final step is to click "Export Online Texture to a file". This will create a very small text file, named Splasher Textures.reg by default, that you can give to your friends or Supergroup members. The file, that you can open with Notepad, simply contains the configuration entries for Splasher to display the textures you've entered.
How to apply the exported images.
Your friends or supergroup members have it very easy when it comes to applying the textures you've created. It's done in three easy steps that take under a minute.
First, download and install Splasher. Point them to this webpage, or just to the installer itself. Three clicks ("Next", "Install", "Close") is all it takes.
Second, open the Splasher Textures.reg file you exported. You can give them this file via email, or upload it to some web server; they just need to download and double click it, or run it from the web. Two clicks later ("Yes", "OK") the textures are imported and ready to be used. You can confirm this, if you want, by opening Splasher: the textures will be in the Online tab.
Third and final step, launch the game using the Splash Randomizer links in the Start Menu. The textures will be applied and the City of Heroes will start.
The textures will be downloaded and applied every time the player starts City of Heroes using the Splash Randomizer. So if you decide to upload an updated version of the Supergroup Schedule, they don't need a new Splasher Textures.reg file: simply upload the new texture to the same location (and with the same name) as the previous one. Next time your friends or Supergroup members launch the game with the Splash Randomizer, the texture will change to the new version.
Labels: howto
How to display thumbnail screens in Explorer.
I've got a couple of requests to add the ability to manage the screens in the Randomizer manually; this is, to be able to see the Randomizer screens once they are in the pool of images, and delete or move them. I've also gotten a couple of requests to display all the TGA screenshots in a folder in thumbnail mode, because Windows' Explorer does not display them.
This post is an answer to both requests. I won't add that functionality into Splasher because it's easy to achieve the same result by installing a small program called
ThumbView Lite and immediately be able to see both the TGA screenshots and the DDS randomizer files in Explorer. It's free software (GPL) and very small (half a megabyte), and you can see the results immediately after installing it.
After installing
ThumbView Lite, you can set the Open dialog box in Splasher to display thumbnails, and you'll be able to see your screenshots before Splasher opens them. And if you want to view what screens you have in the Randomizer and move or delete them, all you have to do is navigate to your City of Heroes game folder (as displayed in the Settings tab) and then enter the Splasher folder inside it. All the images are stored in DDS format inside, and ThumbView will display them just fine.
Labels: howto